Role-Based Windows Authentication with .NET MVC
This is a demo of Windows Authentication implemented in .NET MVC, similar to what I did for an internal site in our organization.
I needed to re-implement a legacy application to use Role-based instead of User-based authentication. The legacy application had hard-coded individual users in the Authorize attribute of the controller (which was perfectly fine). Unfortunately, because it was deployed as a binary DLL, and the original source code was nowhere to be found, adding new users is impossible. Luckily, our application was a simple Windows Authentication that uses the already existing Active Directory (AD), no SQL membership nor any custom role provider.
The way our site works, authenticated users — members of manager role — need to log in to manage school programs and to manage enrollees to these programs. This application has one important aspect — a public-facing page — where the public can register(or log in) and enroll to a program. For the purpose of this demonstration, I’m only showing how I got the Windows Authentication to work.
Application Output
When you run the application, you will be shown by the default .NET MVC application. One of the menu options was Manage which only authenticated users can access.

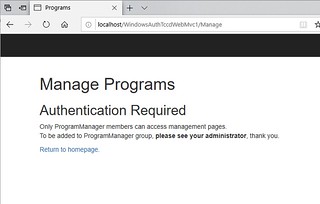
After clicking on Manage, you will be asked to authenticate.

If authenticated successfully, you can access the secure pages. Otherwise, you’ll get an authentication error page. In my case, I created my own, so that it looks more professional.
Quick Overview
To quickly summarize, this is what I did:
- In web.config
- added LDAP connection string
- added membership provider
- added role provider
- In controller,
- added
Authorizeattribute inManageControllerclass (the controller that needs to be accessed only by authenticated users).
- added
- In IIS
- enabled both Windows Authentication
- and (this may not apply to you), I enabled Anonymous Authentication; and in conjunction with anonymous authentication, I made sure
IIS_IUSRShas read access to my website.
Web.config
The web.config is where most of the Windows authentication implementation happens. These are the sections that you need to add inside <configuration> section:
<connectionStrings>
    <add name="ADService" connectionString="LDAP://AVASAY.ldapServer" />
</connectionStrings>

<authentication mode="Windows" />

<system.web>
    <membership defaultProvider="AspNetActiveDirectoryMembershipProvider">
        <providers>
        <add name="AspNetActiveDirectoryMembershipProvider"
            type="System.Web.Security.ActiveDirectoryMembershipProvider, System.Web, Version=4.0.0.0 Culture=neutral, PublicKeyToken=b03f5f7f11d50a3a"
            attributeMapUsername="sAMAccountName"
            connectionStringName="ADService"
            passwordAttemptWindow="10" applicationName="/"
            connectionUsername="xxxxxxxx"
            connectionPassword="xxxxxxxxxx" />
        </providers>
    </membership>
</system.web>

<roleManager defaultProvider="WindowsProvider" enabled="true" cacheRolesInCookie="false">
    <providers>
        <add name="WindowsProvider" type="System.Web.Security.WindowsTokenRoleProvider" />
    </providers>
</roleManager>
The connection string tells the system where your Active Directory (AD) service is:
<connectionStrings>
    <add name="ADService" connectionString="LDAP://AVASAY.NET/DC=tccdweb,DC=net" />
</connectionStrings>
Suffice it to say that you need to know your domain controller that provides the AD service. In my example, AVASAY.NET is the domain controller, and it implements the LDAP protocol. Obviously, I just made up this LDAP URL. In fact, most domain controller I know are created as a subdomain like this: domaincontroller.avasay.net. But using the primary domain like avasay.net is valid as well (as was the case in our organization).
The next line is self-explanatory.
<authentication mode="Windows" />
The next section,
<membership defaultProvider="AspNetActiveDirectoryMembershipProvider">
and everything within it,
<add name="AspNetActiveDirectoryMembershipProvider"
            type="System.Web.Security.ActiveDirectoryMembershipProvider, System.Web, Version=4.0.0.0 Culture=neutral, PublicKeyToken=b03f5f7f11d50a3a"
            attributeMapUsername="sAMAccountName"
            connectionStringName="ADService"
            passwordAttemptWindow="10" applicationName="/"
            connectionUsername="xxxxxxxx"
            connectionPassword="xxxxxxxxxx" />
is what connects our app to the domain controller. The most important key-values are:
attributeMapUsername="sAMAccountName"— this says that we are using usernames without the @domain part(normally, an email address). If you don’t want to use sAMAccountName, you can use userPrinciplaName which uses the @domain part.connectionStringName="ADService"— the ADService was the LDAP connection string from earlier.connectionUsername="xxxxxxxx" connectionPassword="xxxxxxxxxx" />— the username/password is needed to gain entry into AD.
Next is roleManager in which you specify the role provider,
<providers>
    <add name="WindowsProvider" type="System.Web.Security.WindowsTokenRoleProvider" />
</providers>
This is the default Windows role provider. Use this if you’re not using any custom role provider or any SQL membership.
Notes:
- I DID NOT need an
<authorization>tag like this:<authorization> <allow roles="AVASAY\ProgramManager" /> <deny users="?" /> </authorization>The authorization is accomplished inside my ManageController class, which I explain below. In fact, having authorization tag in web. config and not in my controller did not work for me.
Controller
Like I said above, I added an Authorize attribute to my controller to restrict access of resources to specific Role or Group in the AD. The resource in an MVC application is the controller; in my example, it’s the ManageController.
[Authorize(Roles = "AVASAY\\ProgramManager")]
public class ManageController : Controller
{
    public ActionResult Index()
    {
        return View();
    }
}
By placing the Authorize attribute above the class, everything inside ManageController class (e.g., Index, Create, Read, Update, Delete, and all custom methods) is restricted. This means that if a user access a URL that precedes by /Manager/, like this:
http://localhost/WindowsAuthTccdWebMvc1/Manage/
or
http://localhost/WindowsAuthTccdWebMvc1/Manage/Edit
then, you will be asked to authenticate. You may also restrict just specific actions by putting the Authorize attribute above those actions. That’s it for my controller!
IIS
Finally, you need to enable at least Windows Authentication in IIS Manager.

Adding <authentication> section in web config would have probably enabled Windows Authentication in IIS automatically, but check it anyway. Notice that I also enabled Anonymous Authentication because of the nature of our application,
Anonymous Authentication
I feel like I need to explain this a little bit more. I enabled Anonnymous Authentication to give users access to public areas without being prompted for credentials.
Most projects I read about online do not involve anonymous authentication, so you can just ignore this section if you like. Most discussions on StackExchange and StackOverflow involve Windows Authentication only (or Forms Authentication only). Like I mentioned earlier, I needed to do this for our organization because we had a public area for people to register and enroll.
Enabling Anonymous Authentication is not enough though. If you haven’t done already, you also need to make sure you have IIS_IUSRS account allowed to access the website, and that it should have read, and read & execute permission. This user should have this form — machine_name\IIS_IUSRS. You can add it either by using IIS Manager or File Explorer, then going to the Security tab. And I believe that it has the read permission by default.
Summary
- Add some sections in web config such as
connectionStrings,authentication,membership, androleManager. - Add
Authorizeattribute in your controller to restrict access by specific Role or group of resources or functionalities. - Enable Windows Authentication in IIS Manager.
- If it applies, enable Anonymous Authentication and add IIS_IUSRS user.
- Other important notes
- Run Visual Studio as administrator (if you’re using it as IDE).
- Your web server and the AD service provider must be a member of the the same domain. For example, both my webserver and the AD service provider are in AVASAY domain. If you’re testing localhost, you need to be logged in as AVASAY\username, where username is your network login. I have never been able to test successfully across domains , even when the two domains have a Trust relationship. But, let me know if you’ve been able to test across domains.
That’s it!
This project was a little challenging at first, to say the least, because of the different ways people are doing it. Different applications have different levels of complexity when it comes to authentication. But, if your application only requires Windows Authentication by roles in ASP.NET MVC, then this little tutorial is for you, and I do hope it helps you a little in your projects.